Monday, October 26, 2015

Thomas the Tank Engine


One year it's Cranky the Crane, another it's Thomas the Tank Engine.  This familiar character is well loved by many children, and mine were certainly no exception.

It took a little while to think up the concept, but eventually I hit upon treating the train as a vehicle, and dressing the boy up as an engineer.  We did, however, print out a gray scale version of his face to use on the front of the engine, and made it number '10' for family reasons.

This costume was crafted primarily from cardboard, and was challenging more for the sheer size of it than anything else.  Rather than paint, we used craft foam to give it the color, and I was really very pleased with the overall results.


The proud engineer about to get on board


We used a plastic garbage bag crumpled up to simulate coal.


The best part is that by its very nature, the costume came with a built in place to store all of the treats he received from the neighbors.


Cranky the Crane

If you have kids, you probably know about the Island of Sodor, with Thomas the Tank Engine and all the associated characters.  My older son decided he just had to be 'Cranky the Crane'.  This put me into a funk for a while, as I gave thought to how I would pull it off.  I think I succeeded in the end.

Construction of the costume was almost entirely cardboard, hot glued into shape and spray painted gray.  IIRC, the black areas were just sharpie marker.  At the base of the crane, I left the four sides unattached so that his legs would have some freedom to move, which was partially successful.  The bucket was simply hung from some string.
All of the pictures I have of this one came from the parade his elementary school held that year, starting in the classroom after getting dressed up.  The fact that he actually managed to walk all the way around the schoolyard means the thing basically worked.


Clearly he was in a very happy place wearing this, and enjoyed putting on a show for everyone.  The reactions to his costume were very positive, too.


Wario

My kids have been fans of the Nintendo Mario games for years and years, so naturally enough the idea of going as one of the characters from that series has come up several times.  For 2012, my younger guy decided he wanted to be Wario.

Of course, there are commercially made costumes for this popular character, but while we don't entirely avoid such things, we would rather do it better.  The hat and gloves (and maybe the mustache) were obtained that way, but the shirt and overalls were done to a higher standard.

My wife found a pair of appropriately sized overalls, and to be honest I don't really remember where.  There's a better than average chance that they came from the local Goodwill store, though.  She also picked up some Rit purple dye.  This way the costume was not merely presentable, it was tough enough to stand up to the rough treatment it would endure.

The dying process is quite straightforward.  Follow the package directions and you're probably going to get good results.

The boy is way too thin for this character, but a pillow helped a bit.


While Wario was in town, he made a special guest appearance on the Annoying Orange show, too.


Samurai Jack

What could be a better costume to go along with Aku?

I was glad that the boys chose to be these two characters.  They are favorites of mine anyway, and it's always convenient when one of the guys chooses something fairly easy.  And the Jack costume really wasn't difficult to make at all.


This is mostly because my wife had a white robe that was nearly perfect for the job at hand.  All I needed to do was sew some satin ribbon around the edges to get a really nice effect.  A plastic sword, a pair of sandals , a white belt from his karate gi and a straw hat finished things off nicely.


Eternal enemies

Gohan


We did Gohan (from Dragonball Z) for my younger son, to go along with his brother's Goku costume.  While this is undoubtedly a more obscure character (particularly in this outfit), it is what the boy wanted so he got it.

Much like his brother's costume, the easiest starting place was hospital scrubs.  The fit and the color are already done, so it's more a matter of alteration than creation.  So we purchased some inexpensive scrubs at Amazon, and also picked up some red cloth from a local craft store.

A bit of work with scissors and sewing machine was all it really took to get the costume to come together.  I tried to convince him to spend a year working out hard so he'd be buff enough, but since it was a few days until Halloween and he wasn't physically mature enough anyway, that didn't pan out!

This is what it looked like when I was all through.  I think it captures the essence of what i was looking for.


Saturday, October 24, 2015

The Annoying Orange

"The Annoying Orange" is a YouTube series and for a little while it was on television, too.  It tells the story of the adventures of Orange and his fruity friends, all of whom he manages to annoy on a regular basis.

My son just had to be this character.


Now, there's a fundamental problem with this.  The boy is shaped more like a string bean than an orange.  And if I WERE to get him into that rounded a shape, he wouldn't fit through doorways.  In addition, Orange's face takes up his whole body as seen here:

Yes, this is one ugly customer
So I thought to myself that perhaps we'd be better off just painting the kid's face orange and letting it go at that.  Of course, that would leave the rest of his body to deal with, and who would guess what he was anyway?

But then it hit me:  Since this character is best known from YouTube, why not take advantage of that?  We made his costume not so much the Orange itself, but the entire web page!

I downloaded the HTML source for an actual Annoying Orange video and got to work on it.  I'm a techie by nature, and modifying the page a bit was not too difficult.  Actually, the hardest part was coming up with amusing responses and names for the posters.  Then I loaded the modified page in my browser, took a screen shot and printed off a greatly enlarged copy of it.  I glued the many sheets of paper thus generated to a piece of foam core.

I also took enlarged pictures of a few of the other characters in the show.  Passion Fruit, Pear and Mini Apple.  These were also printed and mounted on foam core, and I attached these to bamboo skewers to hold them in place.

To top it off, we replaced the video thumbnails and descriptions on the right side of the page with costumes from previous years.  Each one has the 'run time' of the video shown as the year.  It was a lot of fun to reminisce during the process of coming up with these.

Of course, in order to 'wear' the costume, some straps were needed, but a couple of old belts hot glued to the back of the foam core did a pretty decent job of this.

Finally, we got back to 'paint his face', but now anyone who is the least bit familiar with the character in question knows exactly what's going on!


Goku

This one turned into a contest winner at my son's high school.

Like many kids (and me!), my boys are big fans of Dragonball Z.  So for 2014, they both decided to be characters from the show.  My older guy, naturally enough, decided to be the star of the show, Goku.


It took a bit of wracking my brain, because I'm not all that hot at sewing and this is all cloth.  Eventually though, I hit upon the idea of using hospital scrubs, which are baggy on a thin child and available in the color I needed.

Making the costume itself was not too difficult.  I took a blue shirt and cut it up a bit to get a belt and sleeves.  I cut down the shirt from the scrubs and hemmed them to make it look more like Goku's top.  The hardest part was probably the symbols on the chest and back, but I have a secret weapon:  A wife who feels guilty about me doing most of the work.  I think she did an excellent job on them, inking on white fabric which I then stitched into place.

Here's how it all turned out:


This one was a winner all around.  Easy to make, easy to move around in, and it took first place in his high school costume contest, which is a real coup for a freshman.

Emmet

Everything is Awesome, Especially this Costume!


Another Halloween approaches, so I am on the hook for more costumes.  This year, I got rather lucky.  My oldest son decided he wanted to be Link from "The Legend of Zelda".  Since my brother-in-law made his own Link costume a few years ago and still had it in the closet, I got a free pass on that one.  Well, maybe I have to do something about boots but it's mostly a done deal.

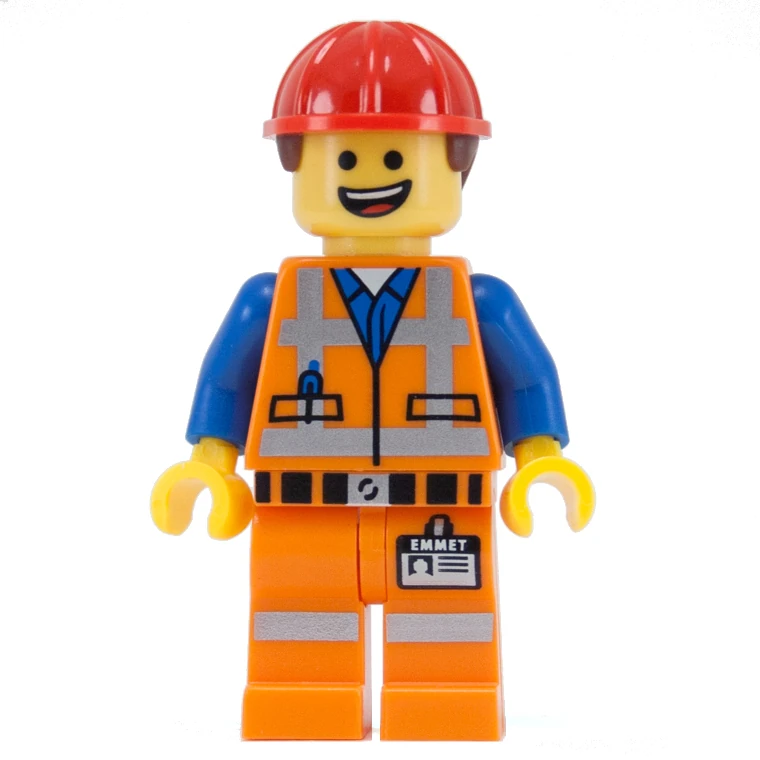
My younger boy, though, decided to be the character Emmet, from "The Lego Movie".  That's this guy right here:

Since the upper body is all planes and angles, it made sense to use cardboard boxes as the base material.  Since I have to deal with angles, though, I decided it was best to take a few measurements of the boy's torso and then make a paper template.  He's tall and thin, so the overall effect will have to be a bit stretched vertically, but I expect it to look pretty good when all is said and done.  


Once we had a template we transferred it to cardboard, lining up the main creases with the pre-existing ones.  I knew I'd have an issue with creating new creases, but I let that one simmer on a mental back burner.  All I knew is that I could create creases in paper with a paperclip, but that would not be nearly strong enough for corrugated cardboard.  The individual pieces all have tabs on them which will be used to hot-glue them to their mates.


The real challenges are the curved bits, like the head and hands.  After a bit of thinking, I realized that a piece of Sonotube (round concrete form) would serve as a really good base for the head.  So I headed over to my local big box hardware store and picked up a four foot long piece of 8" diameter tube.  This stuff is like a giant paper towel roll, but much stiffer.  It's designed to hold it's shape when filled with wet concrete, so I expect that even after cutting big holes it will stay nicely rounded.  As an added bonus, I could use another piece of sonotube to form the front of the hips, which are rounded in the original figure as seen here:

Since the bottom of the head is also rounded, I picked up an 8" diameter foam half ball, which I think will serve nicely once cut up appropriately.  The top of the head is easy.  I just picked up a hard hat while at the store and my wife spray painted it red.  The hat fits beautifully over the Sonotube and doesn't really even need gluing.

The hands are a bit tougher to figure out.  I considered making cloth mittens, and kept that idea in the back of my mind as we searched several craft stores for suitable material.  For a while I considered rolls of packing tape cut to shape, but then my wife came across these yellow foam can cozies which are absolutely perfect.  My only concern was whether or not they'd open up too much once cut up, so we bought three of them (a buck each!) so I'd have a tester.  They work out great, though, staying in almost perfect shapes for our needs.


I also had to deal with the arms.  I had a couple of ideas but settled on using cloth sleeves hot-glued to cutouts in the sides of the torso.  This way he can put on the costume almost like a jacket.  As for closing the 'jacket', self-adhesive velcro fasteners strategically placed should do the job just fine.

One of the hardest things to do, physically, was cutting out the face area on the Sonotube.  The cardboard from which it is made is basically like wood.  This made cutting it to length on my table saw very easy, of course.  After laying out an appropriately sized ellipse I used a knife and razor blade to progressively make a deeper and deeper groove until I had the piece removed.  This made my fingers quite sore but I got the job done.  I left extra material both on top and bottom, so that I can adjust it later on.  The idea is to paint the tube itself yellow, and have the boy's face (in yellow face paint) show through the hole.


That knife in the above picture is part of a multi-tool, and it turns out that the pliers make an excellent scribe for creating crease marks in corrugated cardboard.  I did a quick test and it does a beautiful job.  I also tested out my new hot glue gun to see whether the high or low setting would be better for cardboard.  I couldn't really tell the difference in bond between the two, but I decided to use high temperature just to give me a little more working time for the long seams.

The picture also shows the tube before I trimmed down the top and bottom for what I think is the best size.  The bottom wound up quite close to the face cutout, and even with that there's really no room to put a rounded-off bottom on the head.  Of course, I didn't figure that out until I'd put it all together, shaved down the foam, sanded it smooth, and painted it.  In a way it was a blessing, though.  The styrofoam ball I was using needs to be painted with a brush and acrylic paint, because the volatile compounds in spray paint just completely destroy it.  The color, though, of the Krylon spray we used was perfect.  So doing without the styrofoam did away with a real headache.  I think I did a pretty good job getting everything but the color to match, though.


A waste of time, effort and paint :-(


Naturally, I didn't take enough pictures of the process, but here's what it looked like part way through.  The sleeves and collar (taken from the same shirt) are unattached and untrimmed, but put in place to get a feel for the ultimate look.  As I mentioned earlier, the styrofoam below the head wound up being tossed.  The curved section below the waist is another piece of the concrete form tubing, ripped in half on the tablesaw.


Once we'd reached this point I felt like I was in the home stretch.  I trimmed, hemmed and hot glued the collar to the body (over a piece of white paper which serves as the undershirt).


Some aluminum tape (which is typically used for duct work) turned the big blank body into a safety vest.  My wife also used the tape to make a belt buckle.  She also laid out the rest of the belt and some pockets for the vest and inked them in with a Sharpie marker.


I hot-glued the sleeves to the inside of the arm-holes and the hands.  While the shoulders are glued all around the perimeter, the hands are glued just along a small length, which allows the wearer to pull their hands in and get a good effect, or to fold the hands back so they can stick their own hands out for eating or what have you.


My wife's BFA finally paid off, with this photo-realistic depiction of hair.


I decided to skimp on the legs.  Instead of trying to make a set of fully articulated ones out of cardboard, I hijacked last year's Goku costume pants.  It's close enough for government work.

The only addition that I haven't shown here (along with a full body shot, coming later today) is Emmet's name tag.  That's almost ready to go, but our plan is to get the boy into the costume, paint his face yellow to match, and take an 'ID photo' of him.  We'll print that, attach it to the tag, and then tack that on to the hip area.

Alright, I may have to do some tweaking for comfort, and so that the head turns with that of the wearer, but the overall effect is pretty darned good, I think:


UPDATES for October 30, 2015:

And we have a winner!  Last night we went to a shopping mall and entered a costume contest.  There were over 350 entrants (I saw numbers that high on the stickers each contestant wore).  Fourteen winners were selected, each of whom received a gift card for shopping at the mall.  This costume was one of those selected.

Also, I've entered this costume in an online contest at https://www.myuniquecontest.com.  I'd love it if anyone who comes across this blog entry over the next day or so could vote for it!  The contest is over and, the costume is a winner again!

I'm overall very pleased with this, although we found that while out trick-or-treating the boy's arms got tired and achy.  Apparently he had to hold them out far enough from his body that he became quite uncomfortable.  I'm hoping next year's costume is more along the lines of clothes.